
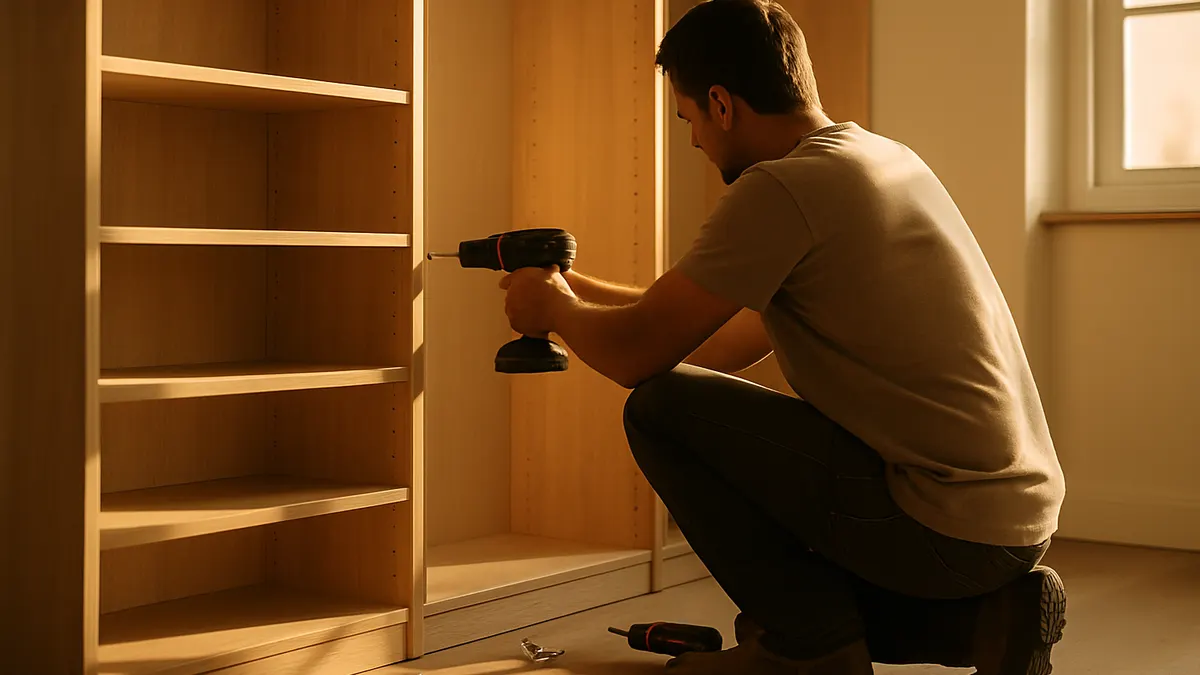
A custom closet installation usually takes four to eight hours for a reach-in closet and one to two days for a large walk-in. The full project runs through five stages — consultation, measurement, design approval, off-site fabrication, and on-site installation — and typically spans three to six weeks from the first appointment to the finished closet. On installation day you will need the closet completely emptied, a clear path from the entry door to the work area, and access to a standard power outlet. Most homeowners are loading clothes back in the same evening.
The good news is that a professionally managed custom closet installation is one of the least disruptive home improvement projects you can take on, and in most homes it starts and finishes inside a single day. Here is a realistic walkthrough of the entire process — from the first measurement to the moment you hang the first shirt.
What a Custom Closet Installation Actually Involves
A custom closet installation is the on-site assembly of a storage system designed and manufactured specifically for your space. A big-box kit is a fixed set of parts you cut and adapt to fit your walls. A custom system is the reverse: your walls are measured first, and the components are fabricated to match them, down to the eighth of an inch.
Because the panels, shelves, drawers, and hanging sections arrive pre-cut and pre-finished, the on-site work is mostly precision assembly rather than fabrication. There is no plywood being ripped in your driveway. Homeowners investing in custom made closets in Newtown, PA are generally surprised by how tidy and contained the process feels compared to the renovation projects they have lived through before.
The Custom Closet Installation Process, Step by Step
Step 1: The Design Consultation
Everything starts with a conversation about how you actually live. A good designer will ask what frustrates you about the current closet, how your wardrobe splits between hanging and folded items, and who else shares the space. Bring specifics — the number of long garments, whether you store luggage or seasonal bedding, how tall you are — because those details drive rod heights and shelf spacing more than any style preference does. For a fuller picture of how designers turn that conversation into a plan, the five important steps for designing a custom closet walk through the same groundwork in more depth.
Step 2: Precise Measurement and Site Assessment
This visit determines whether your closet fits perfectly or fights you for years. An installer measures width, depth, and height at multiple points, because almost no wall in a real house is truly plumb. They also check baseboards, crown molding, vents, light switches, sloped ceilings, and the location of studs and electrical runs. Older Bucks County homes are especially prone to out-of-square corners, and a system designed around a single measurement will show gaps once it is on the wall.
Step 3: Design Review, Material Selection, and Approval
You will receive drawings or a 3D rendering showing elevations, dimensions, and component placement. Read them carefully, because this is the last easy moment to change anything. Confirm rod heights, drawer counts, shelf depths, and whether the top shelf is reachable without a step stool. Finish selection happens here too — many homeowners choose wood closet shelving in Newtown, PA for the warmth and load-bearing strength of natural timber, while others prefer a laminate finish for easier cleaning. Reviewing the mistakes to avoid when designing a custom closet system before you sign off is a genuinely useful ten minutes.
Step 4: Off-Site Fabrication
Once the design is approved, your components go into production: panels cut to size, edges banded, holes drilled for adjustable hardware, drawers assembled and tested. This stage takes two to four weeks and requires nothing from you. It is also why installation day goes so quickly — the hard work has already happened in a controlled shop rather than in your bedroom.
Step 5: Installation Day
The crew arrives with the full system, lays down floor protection, and stages components in a nearby room or hallway. Old shelving, rods, and brackets come out first, and any resulting drywall damage gets patched. Then the installers locate studs, mount the hanging rails or vertical panels, level everything, and build outward: fixed panels, then adjustable shelves, then drawers, rods, and accessories. Systems that rely on custom closet shelves in Newtown, PA with adjustable pin holes let the crew fine-tune spacing on the spot if you decide a section should hold folded sweaters instead of shoes.
Step 6: The Final Walkthrough
Before the crew leaves, walk the closet with them. Open every drawer, tug the rods, check that shelves sit level and doors do not rub. Ask how to adjust shelf heights yourself later, and confirm what the warranty covers. Reputable installers vacuum, haul away packaging and old shelving, and leave the closet ready to load. Never sign off on a job you have not physically tested.
How Long Does Each Stage Take?
Stage | Typical Timeframe | What You Need to Do |
|---|---|---|
Design consultation | 1–2 hours | Share goals, wardrobe inventory, and budget range |
Measurement & site check | 45–90 minutes | Provide access to the closet and surrounding room |
Design approval & finishes | 2–5 days | Review drawings, confirm materials and hardware |
Off-site fabrication | 2–4 weeks | Nothing — production happens in the shop |
On-site installation | 4 hours to 2 days | Empty the closet, clear a path, keep pets away |
Walkthrough & adjustments | 20–30 minutes | Test every drawer, rod, door, and shelf |
How to Prepare Your Home Before Installation Day
A little preparation shortens the job and protects your belongings. Handle these the night before:
- Empty the closet completely. Clothes, shoes, boxes, hangers — everything. Installers cannot work around stored items, and most companies are not permitted to move your belongings.
- Set up a temporary clothing zone. A portable rack or a spare bedroom keeps hanging garments off the floor for a day.
- Clear a path from the front door. Long panels need room to turn corners and navigate stairs.
- Free up a staging area. Roughly one hundred square feet nearby for laying out components and tools.
- Confirm an accessible outlet. Drills, drivers, and vacuums all need power.
- Secure pets and plan around small children. There will be hardware, blades, and open doors.
- Note anything unusual. Old wiring, previous water damage, or a wall you know is hollow — mention it before work starts, not after.
Noise, Dust, and Disruption: The Realistic Picture
Expect intermittent drilling rather than constant noise. A stud finder, an impact driver, and a level do most of the work, with brief bursts of activity separated by quiet assembly. It is comparable to hanging a large gallery wall — noticeable, but easy to work through if you are home.
Dust is minimal because cutting was done off site. What you will see is drywall dust from anchor holes and from patching where old brackets were removed, which crews contain with drop cloths and a shop vacuum. Demolition of existing wire shelving is the messiest thirty minutes of the day, and it happens first. If your project includes new lighting or an outlet, factor in an electrician and a slightly longer schedule — a topic worth its own guide to closet lighting and electrical planning.
What Separates a Careful Installation From a Rushed One
Once the doors close, quality is hard to judge by eye alone. These are the details worth watching for:
- Vertical panels anchored into studs or with rated wall anchors, never into drywall alone.
- Every shelf checked with a level rather than eyeballed against a possibly crooked ceiling line.
- Scribed or filler strips used where walls are out of square, so there are no visible gaps at the edges.
- Drawers that open smoothly to full extension without catching or drooping.
- Consistent reveals — the gaps between doors and drawer fronts should be uniform top to bottom.
- Hanging rods positioned so garments clear the shelf below without brushing it.
- A clean site at the end, with packaging and old components removed.
If something looks off, say so during the walkthrough. Adjustments that take five minutes while the crew is still on site can become a scheduled return visit a week later. Homeowners planning several rooms at once may also want to look at a broader whole-home storage renovation timeline before committing to dates.
After the Installation: Settling In
Resist the urge to dump everything back in at once. Load the closet in the order the design intended: hanging garments first, then folded items, then shoes, then accessories in drawers. Give yourself a week of normal use before deciding whether a shelf should move — most systems are adjustable precisely so you can refine the layout after living with it.
Maintenance is straightforward. Wipe surfaces with a barely damp cloth, avoid soaking wood or laminate edges, and check drawer slides and rod brackets once a year for loosening. Respect the weight limits you were given — overloading a shelf with books or bulk storage is the single most common cause of sagging in an otherwise well-built system. For anyone who wants to go deeper, a practical custom closet care and maintenance checklist makes a useful companion piece.
Making the Day Go Smoothly
A custom closet installation is less a construction project than a carefully choreographed delivery. The measuring, engineering, and building all happen before anyone walks through your door, which is why a space that has frustrated you for years can be transformed between breakfast and dinner. Your part is simple: empty the closet, clear the path, and ask questions during the walkthrough.
If you are weighing a closet project for your own home and want to understand what the process would look like in your specific space, the design team at Closets Creation Inc has been building and installing custom storage across Bucks County and the greater Philadelphia area for years, and a straightforward conversation about your closet is the natural place to start.
Frequently Asked Questions
How long does a custom closet installation take?
Most reach-in closets are completed in four to eight hours. A standard walk-in typically takes a full day, and large or multi-room projects run one to two days. Removing existing built-ins, patching drywall, or adding electrical work extends the schedule.
Do I need to be home during the installation?
Be present at the start to review the plan and at the end for the walkthrough. Many homeowners come and go in between; confirm access arrangements in advance if you plan to leave.
Will installers move my clothes and belongings?
No. The closet must be emptied before the crew arrives. This is a liability matter for most companies, and an empty closet lets the team work far more quickly.
Does installing a custom closet damage the walls?
Installation requires anchor holes, and removing old shelving leaves existing bracket holes behind. Professional crews patch these as part of the job, and the finished system covers most of the wall surface anyway.
Can a custom closet be installed in an older home with uneven walls?
Yes. This is exactly where custom systems outperform prefabricated kits. Installers use scribing, filler panels, and shims to accommodate walls that are out of plumb or square — common in older Pennsylvania homes.
What happens if something does not fit correctly?
Minor issues are usually corrected on the spot; a mis-cut component is remade and installed on a return visit at no charge. Ask about this policy before you sign a contract.
How soon can I use the closet after installation?
Immediately in most cases. Pre-finished components require no curing or off-gassing time. If any on-site painting or staining was involved, allow twenty-four to forty-eight hours before loading heavy items.