
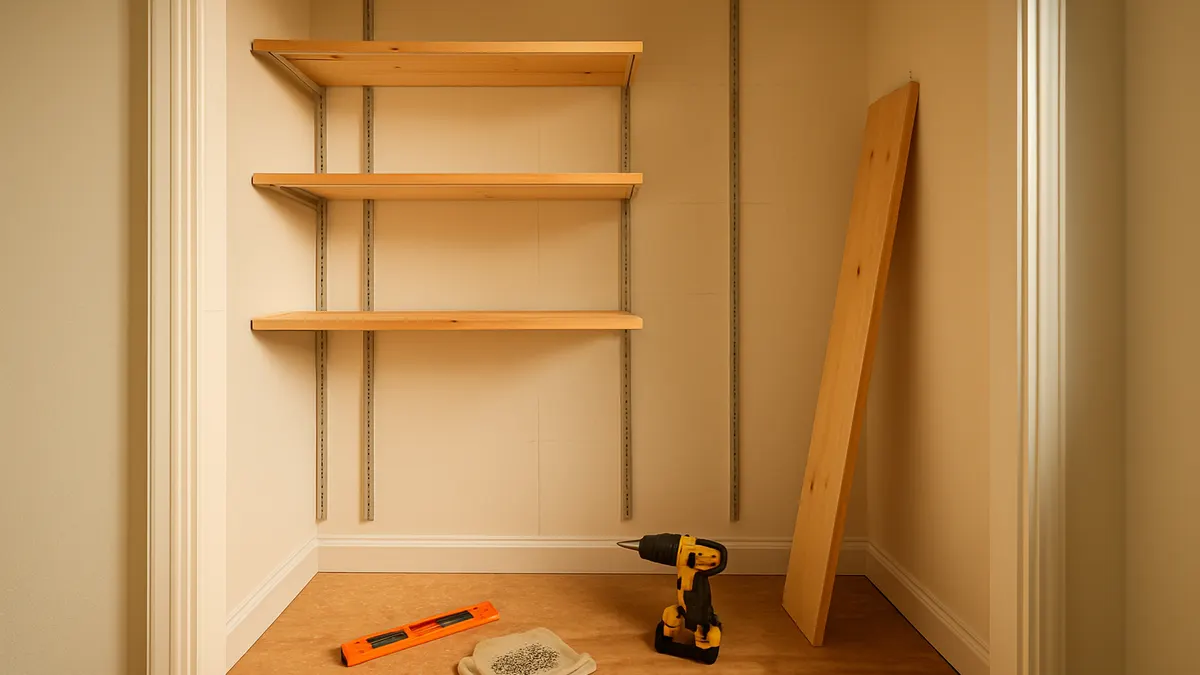
If your closet feels like a black hole where clothes disappear and shoes pile up, a DIY closet system can turn that chaos into order without a big budget or a contractor. Building your own DIY closet organizer simply means adding shelves, rods, and storage pieces that fit your space and the way you actually get dressed. Good closet organization does not require a huge closet, since even a small, cramped space works better once every inch is put to use. Doing it yourself means you control the layout, the materials, and the cost, and you pick up a skill you can reuse elsewhere in the house. In this guide, you will learn how to measure and plan, choose materials and tools, follow a clear step by step build process, and avoid the mistakes that trip up most beginners. No advanced carpentry experience is needed, just patience and a level.
What Is a DIY Closet System?
A closet storage system is simply a combination of parts that work together to organize your clothes and belongings, including shelves for folded items, hanging rods for shirts and dresses, drawers or baskets for smaller items, a section for shoe storage, and vertical storage that uses the space above and below eye level. A DIY closet organizer does not need to be complicated. Many effective setups use basic closet shelving, a few brackets, and one or two rods, without any custom cabinetry or expensive materials. The goal is simply to match the parts of the system to how you actually store and access your things.
Plan Your Closet Before You Start
Measure the Closet Space
Before buying a single board, grab a tape measure and record the width, height, and depth of the closet, along with how far the door swings open, since that clearance affects where shelves and rods can sit. Note any existing shelving, wiring, vents, or awkward corners that might get in the way. Accurate closet measurements matter because even a small error can mean a shelf that does not fit or materials you have to return and recut.
Decide What You Need to Store
Think through what actually lives in this closet. Hanging clothes need rod space, folded clothes need shelves or drawers, shoes need their own storage, and accessories like belts, bags, and scarves often do better in bins or on hooks. Seasonal items, such as winter coats, can go on a higher shelf since they are used less often. Listing your storage needs before building helps you avoid a system that looks nice but does not actually hold what you own.
Sketch a Simple Layout
You do not need professional drafting skills for this. A simple pencil sketch showing where each shelf, rod, and bin will go is enough. Mark the closet dimensions on the paper and rough in the sections so you can see the layout before committing to it. If you want extra guidance putting the pieces together, browsing a few closet design examples can help you picture how everything fits before you start marking the wall. This closet layout becomes your reference point for every step that follows.
Choose the Right Materials and Tools
Common Materials
Most DIY systems are built from a mix of wood boards, plywood, closet rods, shelf brackets, screws, and wall anchors, with baskets or storage bins rounding things out for shoes and loose items. The right closet shelving materials depend on your closet size, budget, and how much weight the shelves need to hold. A shelf holding folded sweaters needs less support than one holding heavy bins or shoe boxes, so plan your hardware around the actual load.
Basic Tools
For most closet installation projects, you will need a tape measure, a level, a pencil, a drill, a screwdriver, and a stud finder, plus a saw if you are cutting your own boards to size. None of these tools are exotic, and many beginners already have most of them or can borrow what is missing.
Step by Step: How to Build a DIY Closet System
Step 1: Clear and Prepare the Closet
Start by removing everything from the closet, including any old shelving you plan to replace. Once it is empty, clean the walls and floor and check the wall condition, patching any holes or damage now, since that is much easier to do before new hardware goes in.
Step 2: Mark the Layout
Transfer your sketch onto the actual wall using a pencil and level. Mark where each shelf will sit, where rods will hang, and where any vertical dividers will go. Take your time here, since a layout that looks close by eye can be noticeably off once shelves and rods are installed.
Step 3: Locate Wall Studs
Run a stud finder along the marked lines to locate the studs behind the drywall. Studs give you a much stronger anchor point than drywall alone, especially for anything carrying real weight, like a main shelf or a loaded hanging rod. You do not need to understand wall framing in depth, just know that securing heavier pieces into a stud, rather than only into drywall, keeps the system from sagging or pulling loose over time.
Step 4: Install the Main Supports
With your layout marked and studs located, install the brackets, cleats, or vertical panels that will carry the rest of the system. Attach these into the studs wherever possible, and use proper wall anchors where a stud is not available. Check the level constantly, since these supports set the foundation for everything installed afterward.
Step 5: Add Closet Shelves
Install your shelves according to the layout you planned, leaving enough room below each one for folded clothing to sit comfortably. Avoid making shelves deeper than necessary, since overly deep shelves waste space and make items at the back hard to reach. Once each shelf is in place, give it a firm push to confirm it is securely supported before moving on.
Step 6: Install Closet Rods
Position your rods where hanging clothes are easy to reach without garments dragging on the floor. If you store a mix of short items, like shirts, and long items, like dresses or coats, consider different rod heights for each. A double hanging rod setup can roughly double your usable hanging space in areas reserved for shorter clothing.
Step 7: Add Storage for Shoes and Accessories
With the main structure in place, add smaller storage elements. Shoe shelves, stackable bins, and small baskets work well for shoes, while hooks or narrow bins handle accessories like belts and scarves. These smaller additions are what make a closet system feel finished and genuinely useful day to day.
Step 8: Test the System
Before you move any clothes back in, test everything. Check that every shelf is level, confirm each rod is firmly secured, and press on the supports to check for movement or loose hardware. Open and close the closet door a few times to make sure nothing new is blocking it. Catching a loose bracket now is far easier than dealing with a collapse later, once the closet is full.
How to Make a DIY Closet System Work Better
Once your system is built, a few habits keep it working well over time. Use vertical space fully, since the area near the ceiling and floor often goes unused even though it can hold seasonal or rarely used items. Keep frequently worn clothing at an easy to reach height, and reserve higher or lower shelves for things you grab less often. Separate hanging storage from folded clothing storage rather than mixing them, since that makes it much easier to find things and put them away correctly. Pairing your shelves and rods with a few dedicated closet storage solutions, such as labeled bins or drawer dividers, keeps everything easy to find once the closet is in daily use. Finally, resist the urge to fill every shelf completely, since leaving some open space gives you room to reorganize later without redoing the whole closet.
Common DIY Closet Mistakes to Avoid
Skipping accurate measurements is one of the most common errors, since it can lead to shelves that do not fit or gaps that waste space. Not checking for wall studs is another frequent mistake, since it often results in shelves or rods pulling away from the wall once they carry real weight. Making shelves too deep wastes closet depth and buries items at the back where they get forgotten. Ignoring door clearance can mean a beautifully built system that the door will not actually close over. Overloading shelves or rods beyond what the hardware can handle leads to sagging or failure over time. Finally, building without first planning what will actually be stored often results in a system that looks organized but does not match how you really use the closet.
DIY Closet System vs. Custom Closet System
A DIY closet system gives you more control over your budget and lets you customize the layout to your exact space, which suits people who are comfortable using basic tools and do not mind doing the planning and installation themselves. A custom closet system is designed specifically around your space by a professional, which means far less hands on work for the homeowner and often more specialized storage options, such as built in drawers or tailored shoe racks, though it typically comes at a higher cost. Neither option is universally better. The right choice depends on your budget, your comfort with tools, and how complex your storage needs really are.
When Should You Choose a Different Closet Solution?
A DIY approach is not always the right fit. If your closet has unusual dimensions, angled ceilings, or an irregular shape, a custom solution may fit the space far better than standard materials. Walls that need significant repair before anything can be mounted are also a sign to bring in a professional first. Complex storage needs, such as a large walk in closet organization project with many zones, can be easier to plan with expert help. If you do not have the necessary tools or feel unsure about locating studs and securing weight bearing hardware, or if the system needs to support unusually heavy items, it is worth considering a professional installation instead.
Plan Well, Build Once
Good planning matters more than complicated construction when it comes to closet organization. Accurate measurements, a clear sense of what you need to store, and a simple sketch will save you more time and money than any fancy tool. A basic DIY closet system, built carefully and tested before use, can significantly improve how a closet functions, whether it is a small reach in closet or a larger walk in space. Start with your actual storage needs, build around them step by step, and always test the system before loading it with your belongings.
If you would rather skip the trial and error and get a professional result the first time, our team can help. Check out our closet storage shelves for a custom built option that takes the guesswork out of the process.
Proudly Serving Homeowners Near You
We also help homeowners build and install closet systems throughout the surrounding area, including Yardley, Feasterville, Holland, Warminster, and Newtown.
FAQs
Is it cheaper to build a DIY closet system?
In most cases, yes, building it yourself reduces installation labor costs. That said, the total cost still depends on the materials you choose, the tools you need to buy or borrow, and the overall size and complexity of the project, so it is worth comparing your expected material costs against a quote for a custom closet system before deciding.
What is the best material for a DIY closet system?
There is no single best material for every closet. Plywood is popular for its strength and relatively lower cost, solid wood offers a more finished look but usually costs more, and wire or laminate shelving can be a budget friendly, lightweight option. The right material depends on your budget, the weight the shelves will carry, and the look you want in the finished space.
How deep should DIY closet shelves be?
A common range for closet shelves is around 12 to 16 inches deep, though the ideal depth depends on what you plan to store. Shelves for folded clothing can be shallower, while shelves meant for bins or shoe boxes may need extra depth. Measuring your typical storage items before cutting shelves helps avoid wasted space.
How much weight can a DIY closet rod hold?
Weight capacity depends on several factors together, including the rod material, the strength and spacing of the brackets, how far the rod spans without support, and whether it is anchored into a wall stud. A rod installed into studs with sturdy brackets and a shorter span will generally hold significantly more weight than an unsupported rod anchored only into drywall.
Can a beginner install a DIY closet organizer?
Yes, many closet organizer projects are approachable for beginners, especially simpler layouts with a shelf and one or two rods. A project is generally beginner friendly when it does not involve major wall repair, unusual closet dimensions, or heavy load requirements. If the project involves those factors, getting help from a professional installer is a reasonable choice.
How do I make a small closet more functional?
Focus on vertical storage to use the space near the ceiling and floor, add a double hanging rod where you store shorter garments, and choose shelving sized to your actual items rather than oversized shelves that waste depth. Using bins and baskets for small or loose items also helps a small closet feel far less cluttered.