
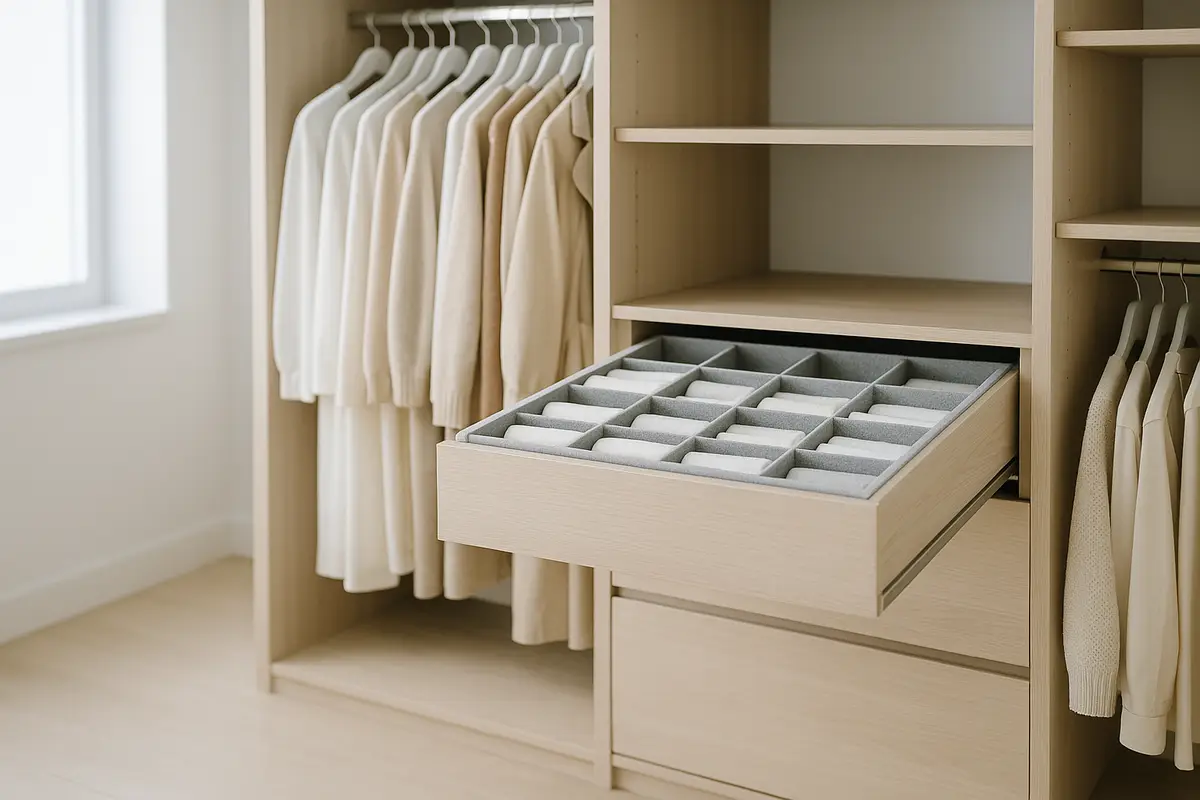
A walk-in closet should be one of the most peaceful spots in your home. It’s where your day begins and ends — so it deserves more than a jumble of clothes piled on shelves and shoes scattered across the floor. Whether your closet feels chaotic right now or you simply want to get more out of the space, organizing it the right way can completely transform your daily routine.
This step-by-step guide walks you through everything — from the first round of decluttering to choosing the right storage systems — so you end up with a closet that actually works for your lifestyle. And if you’re ready to move beyond DIY fixes, pairing a smart organizational plan with custom-built storage solutions can take the end result to an entirely different level.
Step 1: Empty Everything Out First
Before you can build a better system, you need a clean slate. Pull everything out of the closet — every item of clothing, every pair of shoes, every accessory, and anything else that has found its way in there over the years.
Seeing all your belongings laid out on the bed or floor does two things: it helps you understand exactly what you’re working with, and it forces you to make decisions you might otherwise avoid. Many people are genuinely surprised by how much has quietly accumulated.
Once everything is out, give the closet a solid wipe-down. Clean the shelves, vacuum the floor, and dust off any rods or hardware. You’re setting the stage for a fresh start — and a cleaner surface makes the whole process feel more deliberate.
Step 2: Declutter with Intention
Now comes the most important part: deciding what stays and what goes. Divide everything into four categories:
- Keep — Items you wear or use regularly and that genuinely earn their place in your wardrobe.
- Donate — Clothes in good condition that no longer fit your style, body, or life stage.
- Toss — Worn-out or damaged items that aren’t useful to anyone.
- Store elsewhere — Seasonal items or rarely used pieces that don’t need prime closet real estate.
A useful rule of thumb: if you haven’t worn it in a year, you probably won’t. Be honest with yourself. The goal isn’t a fuller closet — it’s a more functional one.
If you tend to accumulate over time and find the clutter creeping back, our post on closet features that help reduce clutter is worth reading before you start putting things back.
Step 3: Evaluate Your Space Before Touching a Single Shelf
Before anything goes back in, spend a few minutes really looking at what your closet offers. Measure the total square footage, note where current rods and shelves sit, identify any dead zones like high corners or awkward floor areas, and think about how light — natural or artificial — moves through the space.
Pay special attention to vertical space. Most walk-in closets have far more height than people actually use. Adding a second hanging rod below shorter garments or using stacked shelving that reaches toward the ceiling can dramatically increase capacity without changing the room’s footprint at all.
Visibility is just as important as capacity. If you can’t clearly see what’s inside your closet, organization breaks down fast. Our detailed guide on improving how you see and access items in walk-in closets walks through layout and lighting choices that make a real practical difference every morning.
Step 4: Create Zones Based on How You Actually Live
The best closets don’t just store things — they’re organized around the way you actually use them. Zoning means grouping similar items together in dedicated areas so that every morning feels intuitive rather than frustrating.
Here’s a zoning approach that works for most walk-in closets:
- Hanging zone: Full-length garments on one side; shorter items like shirts, jackets, and blazers on the other.
- Folded clothing zone: Sweaters, jeans, and casual wear on open shelves or inside pull-out drawers.
- Shoe zone: Dedicated shelving, cubbies, or a slanted shoe rack along one wall near the floor.
- Accessories zone: Hooks, trays, small drawers, or a jewelry organizer for bags, belts, scarves, and jewelry.
- Seasonal or rarely used zone: Upper shelves for items that rotate in and out depending on the time of year.
For seasonal clothing specifically, see our practical guide on keeping seasonal wardrobes separated and easy to rotate so your everyday space stays clear and usable year-round.
If you share the closet with a partner or other family members, clear zoning becomes even more critical. Our post on storage solutions for households with multiple users covers practical strategies for dividing the space without constant friction.
Step 5: Choose the Right Shelving and Storage Infrastructure
Your organizational system is only as good as the infrastructure behind it. The right shelving turns a plan into something that holds up day after day — and the wrong shelving quietly undermines everything.
If your closet currently has wire shelving or a single basic rod, that setup may be silently limiting what’s possible. Upgrading to solid wood closet shelving provides a more durable, versatile, and visually appealing foundation — and allows for far more configurations tailored to your exact needs.
Here are the most useful storage elements to incorporate:
- Double-hang rods: Maximize vertical space by stacking a second rod below shorter garments.
- Adjustable shelves: Adapt over time as your wardrobe and storage needs evolve.
- Pull-out drawers: Ideal for folded items, underwear, and smaller accessories that deserve a dedicated home.
- Cubbies and open bins: Great for shoes, bags, or grouping items by category.
- Hooks and pegs: A quick, effective solution for belts, scarves, robes, and everyday bags.
If you’re serious about using every inch intelligently, purpose-built closet shelving systems designed specifically for your room’s exact dimensions will outperform any off-the-shelf product every time.
Not sure what to prioritize? Our blog post on what to think through before planning your closet design is a helpful starting point — it covers storage needs, lifestyle habits, and layout questions worth answering before you commit to anything.
Step 6: Put Everything Back — with Purpose
Now it’s time to return your “keep” items to the closet. Here’s how to place things for maximum day-to-day efficiency:
- Keep everyday items at eye level and within easy reach.
- Place formalwear, seasonal pieces, and rarely worn items on higher shelves or toward the back.
- Face all hanging items in the same direction.
- Organize clothing by color within each category — this makes it dramatically easier to find things at a glance.
- Label bins, baskets, and shelf sections so the system stays intuitive for everyone who uses the space.
Small habits compound over time. When everything has a designated spot, putting things back becomes just as easy as getting them out. If you’re remodeling and worry about regretting your storage decisions later, take a look at what homeowners most often wish they had planned differently before you finalize your setup.
Step 7: Add the Finishing Touches That Elevate the Experience
Once the core organization is in place, a few finishing details can significantly improve the experience of using the space every day:
- Good lighting — recessed fixtures, LED strips under shelves, or a well-placed overhead light — changes how the entire closet feels and functions. Our article on how closet lighting affects both the atmosphere and usability of the space explains what works best in different layout types.
- A full-length mirror mounted on the wall or door saves time and makes the space feel larger.
- A small bench or ottoman near the shoe area creates a comfortable spot to sit while getting ready.
- Cedar blocks or sachets naturally repel moths and keep clothing smelling fresh.
These aren’t just cosmetic additions — they reduce friction in your daily routine and make the closet a space you genuinely look forward to walking into.
How to Keep Your Walk-In Closet Organized for the Long Term
The hardest part isn’t organizing the closet — it’s keeping it that way. The good news is that a well-designed system makes ongoing maintenance almost effortless, especially when paired with a few simple habits:
- Quarterly review: Every few months, revisit what’s in the closet and remove anything that no longer belongs.
- One-in, one-out: When something new comes in, something old goes out.
- Return things immediately: Clutter almost always starts with one or two items left out of place.
- Keep the floor clear: The floor is for shoes and designated baskets — not overflow piles.
A custom-built closet also makes it much easier for your entire household to maintain the system. See how the right design choices help simplify mornings for busy homeowners and take the guesswork out of staying organized.
Common Mistakes to Avoid When Organizing a Walk-In Closet
Even with the best intentions, a few planning mistakes can undermine an otherwise solid system. Understanding what to avoid upfront saves you a lot of rework later.
Our post on design decisions that often backfire in custom closet projects covers the most common errors homeowners make — from underestimating hanging space to ignoring the importance of drawer depth. It’s particularly useful if you’re planning any kind of hardware upgrade alongside your reorganization effort.
Another often-overlooked factor is how new shelving can transform the entire feel of a storage space. The post exploring what updated shelving does for a closet’s overall function is a quick, practical read that puts the value of good infrastructure into perspective.
Organizing a Wooden Closet: A Few Extra Considerations
If your walk-in closet features wood shelving and cabinetry, there are some additional tips worth keeping in mind. Wood responds to humidity, so maintaining consistent airflow inside the closet matters — especially for garments stored over long periods.
For a deeper look at techniques specific to wood-based storage, our blog on keeping everything in order inside a wooden wardrobe system covers practical strategies for maintaining both organization and the condition of the shelving itself.
When It’s Time to Move Beyond DIY
DIY organization can take you a long way, but there comes a point where the space itself is the limitation. If your closet is too narrow, lacks sufficient hanging capacity, or simply doesn’t match the volume of what you own, no amount of rearranging will fully solve the problem.
That’s when investing in a purpose-built solution makes sense. If you’re unsure whether your space really needs it, our post on when a professional closet organizer is the right call lays out the factors worth weighing before you decide.
And if you’re thinking about your closet as an investment in your home’s value — not just your daily routine — read about how custom closets contribute to a home’s overall worth. It’s a perspective shift that makes the decision a lot clearer.
Closets Creation proudly serves homeowners throughout Bucks County and the surrounding region, including communities like Yardley, Southampton, Warminster, Holland, Richboro, and Newtown. If you’re local and ready to explore what a custom walk-in closet transformation could look like in your home, we’re here to help every step of the way.
Frequently Asked Questions
How do I start organizing a walk-in closet from scratch?
Start by completely emptying the closet and sorting everything into four groups: keep, donate, toss, and store elsewhere. Once you know exactly what you’re working with, measure the space, plan zones for different item categories, and reintroduce items thoughtfully. Build the system around how you actually use your wardrobe — not an idealized version of it.
What is the most efficient layout for a walk-in closet?
For most people, a U-shaped or L-shaped layout works best because it keeps different zones — hanging, folded, and shoes — within easy reach without crossing the room. If your closet is narrow, check out our guide on the best layout approaches for long, slim closet footprints for a single-wall arrangement that makes the most of limited width.
How do I maximize space in a small walk-in closet?
Use vertical space aggressively — stacked shelving, upper rods for off-season clothing, and hooks near the door all help. Double-hang rods for shorter garments are one of the easiest wins in any size closet. Storing out-of-season items in labeled bins on high shelves keeps prime real estate clear for daily use.
Should I use open shelves or drawers in a walk-in closet?
Open shelves work well for folded items you want to see and access quickly — sweaters, jeans, and shoes are common candidates. Drawers are better for smaller items that tend to scatter, like underwear, socks, and accessories. A combination of both usually produces the most functional result.
How often should I reorganize my walk-in closet?
A thorough reorganization once or twice a year — typically aligned with seasonal transitions — keeps things from accumulating. Between those sessions, a quick weekly tidy-up is usually enough to maintain the system.
Is a custom closet system worth the investment?
For most homeowners, yes — especially if the current setup doesn’t match the volume or variety of what you own. Purpose-designed closet systems are built around your exact room dimensions and habits, which means no wasted space, no awkward workarounds, and a result that genuinely fits how you live. The long-term payoff in daily convenience typically far outweighs the upfront cost.